Documentation
How Corrigo works
Everything the app does, explained — from the first launch to advanced provider setups. Five minutes of reading covers all of it.
Getting started
1. Install
Pick macOS or Windows on the download page. Each installer has a SHA-256 checksum — verify it before you open the file.
macOS
Download the DMG, drag Corrigo into Applications, and open it. The build is signed with Developer ID and notarized by Apple.
Windows
Temporarily unavailable — the Windows installer is being updated for the new release. When it returns: download CorrigoSetup-<version>.exe and run it (per-user setup, no administrator account). The beta is not Authenticode-signed yet, so SmartScreen may warn — choose More info → Run anyway if you downloaded it from corrigo.me.
2. Grant the Accessibility permission
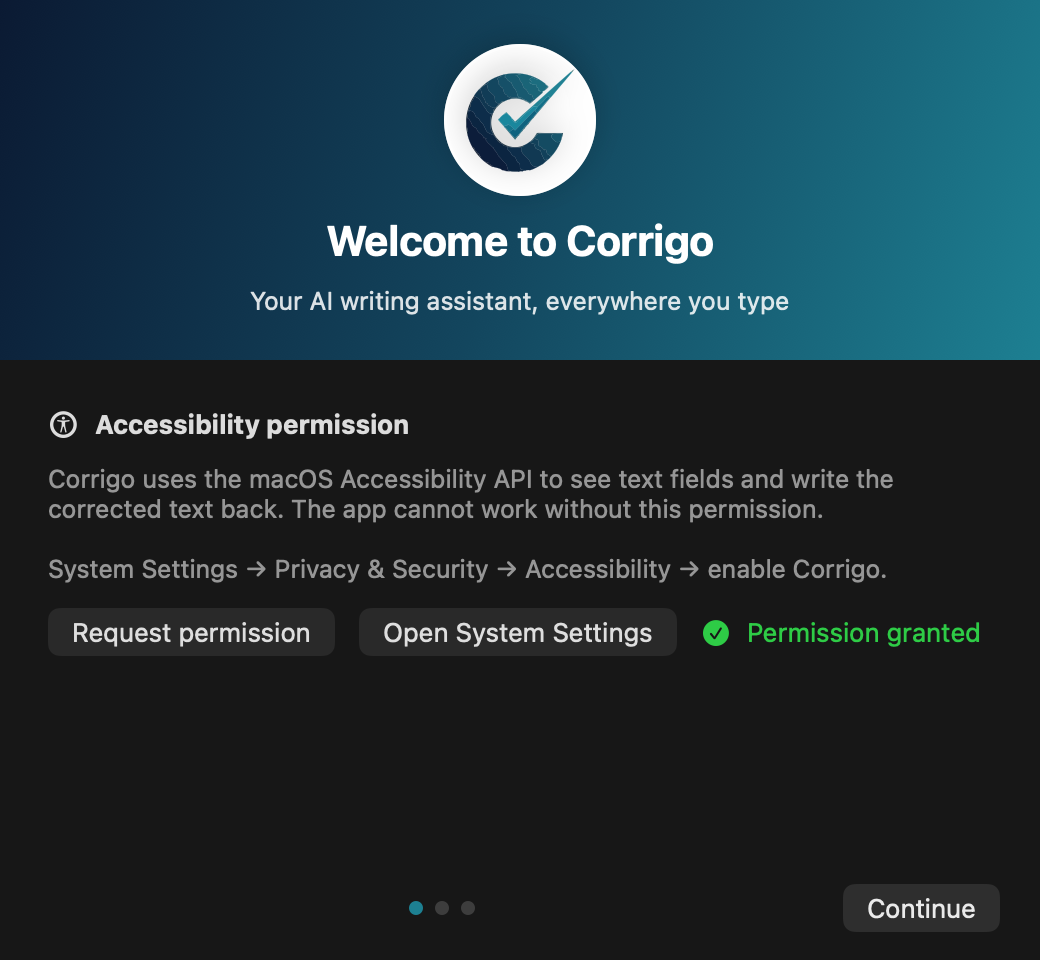
Corrigo uses the macOS Accessibility API to see text fields and write corrected text back — it cannot work without it. The onboarding wizard asks for it on first launch: click Request permission, then enable Corrigo in System Settings → Privacy & Security → Accessibility.
Updating from an older build?
3. Sign in
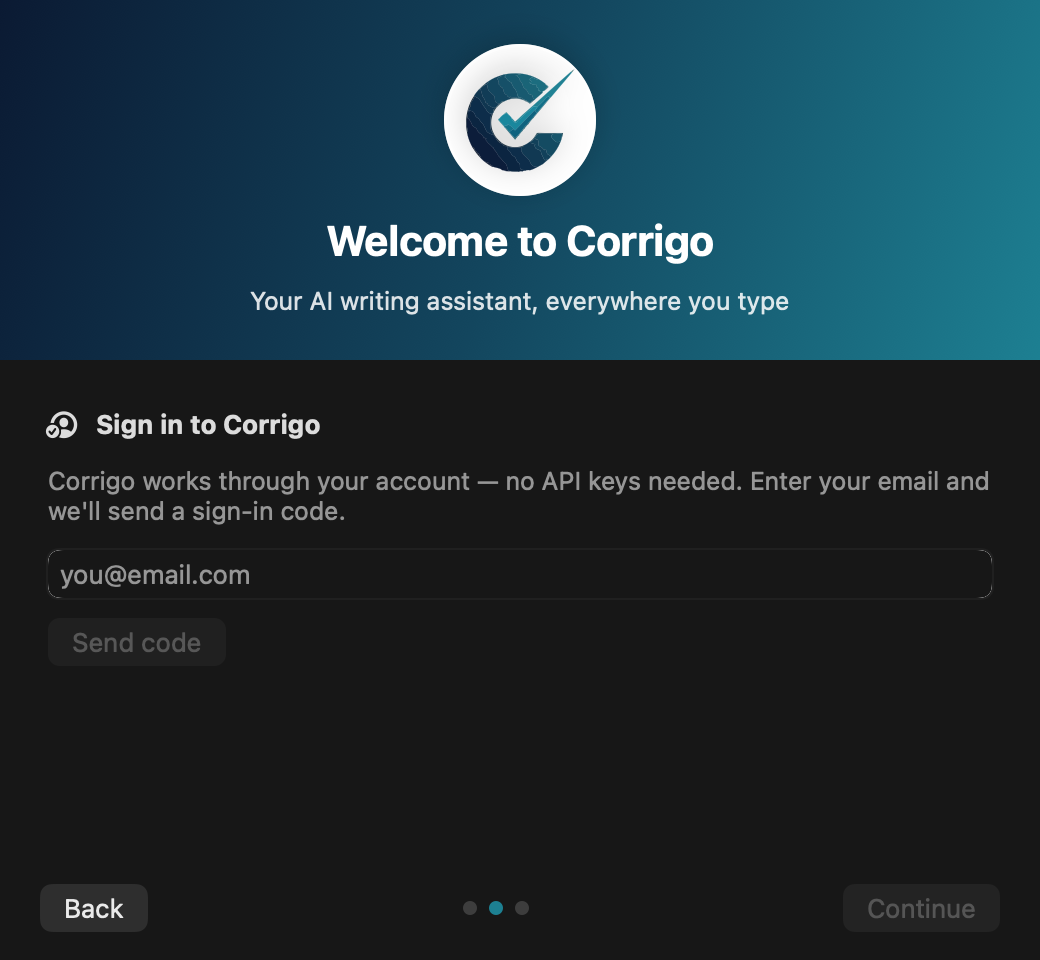
Enter your email and we send a 6-digit sign-in code — no password, no API keys. Corrigo's hosted AI handles your requests from there, and every new account starts on Free, no card required. Your session is stored only in the macOS Keychain (Windows: DPAPI).
Have a license key from Gumroad?
The bubble
Focus any editable text field and type at least three words — Corrigo's bubble appears in the field's bottom-right corner. It works system-wide: native Mac apps, Electron apps like Slack, and web apps in your browser.
- It follows the field as you move or resize the window, on any display.
- It never appears in password fields, during secure input, or in apps you've blocked (password managers and terminals are blocked by default).
- Ring colors: teal — ready · gray — working · red — something needs attention (usually you're signed out).
- The minimum word count is adjustable in Settings → General.
Correction
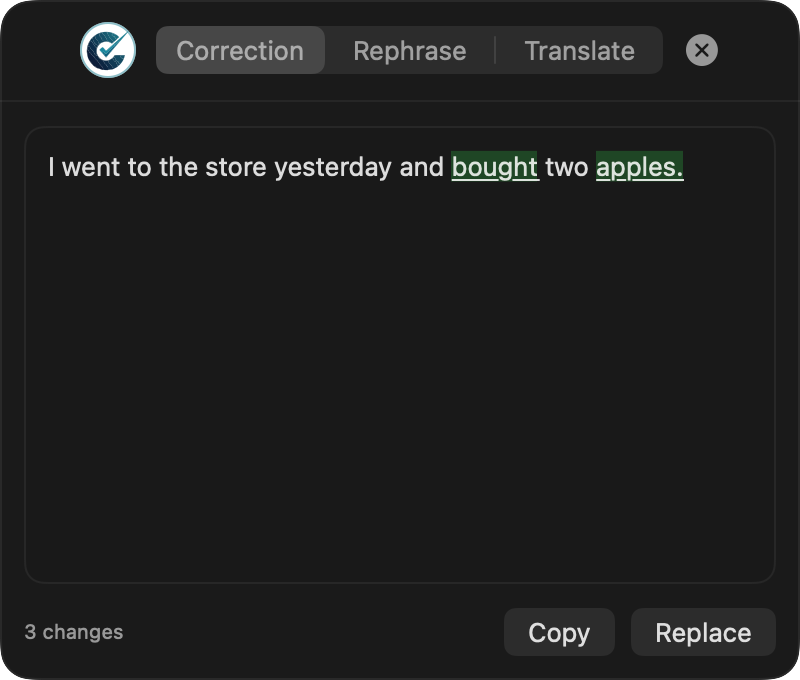
Click the bubble (or press ⌘⇧G) and the suggestion popover opens on the Correction tab. Your text — the whole field, or just your selection if you made one — is sent for proofreading: grammar, spelling and punctuation, in whatever language you wrote.
- Changed words are highlighted in green, with the change count shown below.
- Replace writes the corrected text back into the original field. Return does the same.
- Copy puts it on the clipboard instead.
- If your text is already correct, Corrigo says so — it never invents edits.
Rephrase
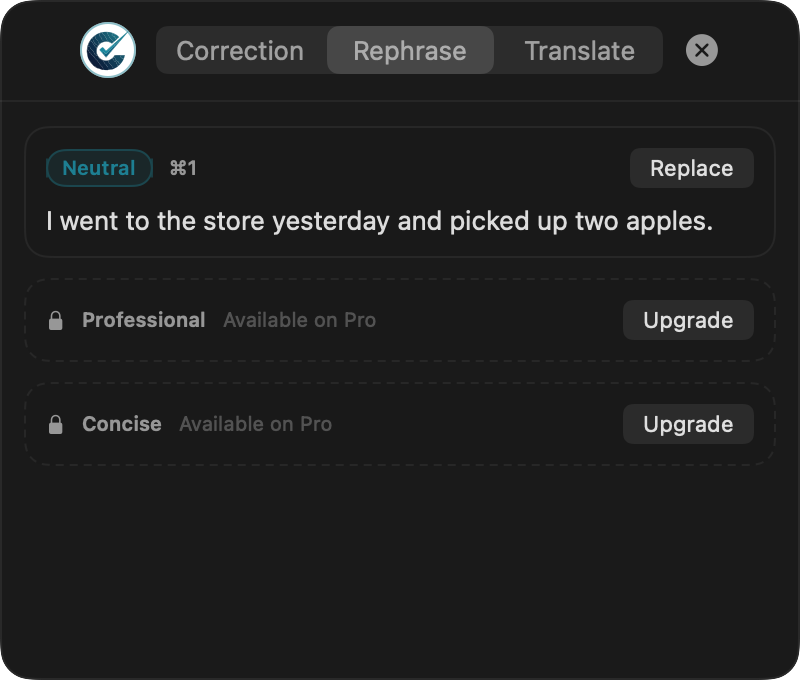
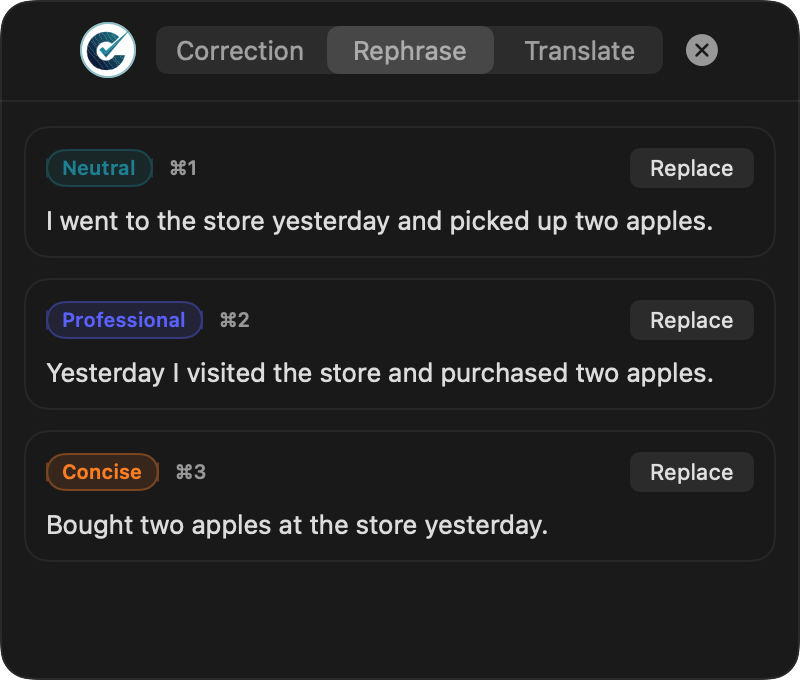
The second tab offers the same sentence rewritten three ways. Both tabs load in parallel the moment you click the bubble, so switching is instant.
- Neutral — a more natural version of what you wrote, same register.
- Professional — a more formal tone, for client emails and reports.
- Concise — the same meaning in fewer words.
On the Free plan you get the Neutral variant; the other tones stay visible but locked, with a one-click upgrade. Pro and Max unlock them all.
Translate
The third tab turns the sentence you already wrote into another language — same field, same Replace. Write in one language, send in another.
Translation is on Pro and Max. Correction still keeps the language you typed in when you are not translating.
Replace & Undo
Replacing text in someone else's app is the hard part, and Corrigo uses a chain of three strategies so it works nearly everywhere:
- Direct write through the Accessibility API — clean and flicker-free (most native apps).
- Select-and-type — selects the whole field and replaces the selection (Electron apps like Slack).
- Clipboard fallback — simulates ⌘A + ⌘V, then restores your clipboard exactly as it was, every content type included.
After every replacement a small toast appears with an Undo button — you have 10 seconds to bring the original text back.
Keyboard shortcut
On macOS, ⌘⇧G works anywhere. On Windows, the same shortcut is Ctrl+Shift+G. Either one opens the same popover as clicking the bubble. In apps that don't expose text fields to Accessibility / UI Automation (some games, old Java apps), the shortcut falls back to a clipboard flow: it copies your selection, processes it, and pastes the replacement.
Settings
Open Settings from the menu bar icon. Four tabs:
- General — interface language (English / Serbian), the word-count threshold for the bubble, launch at login.
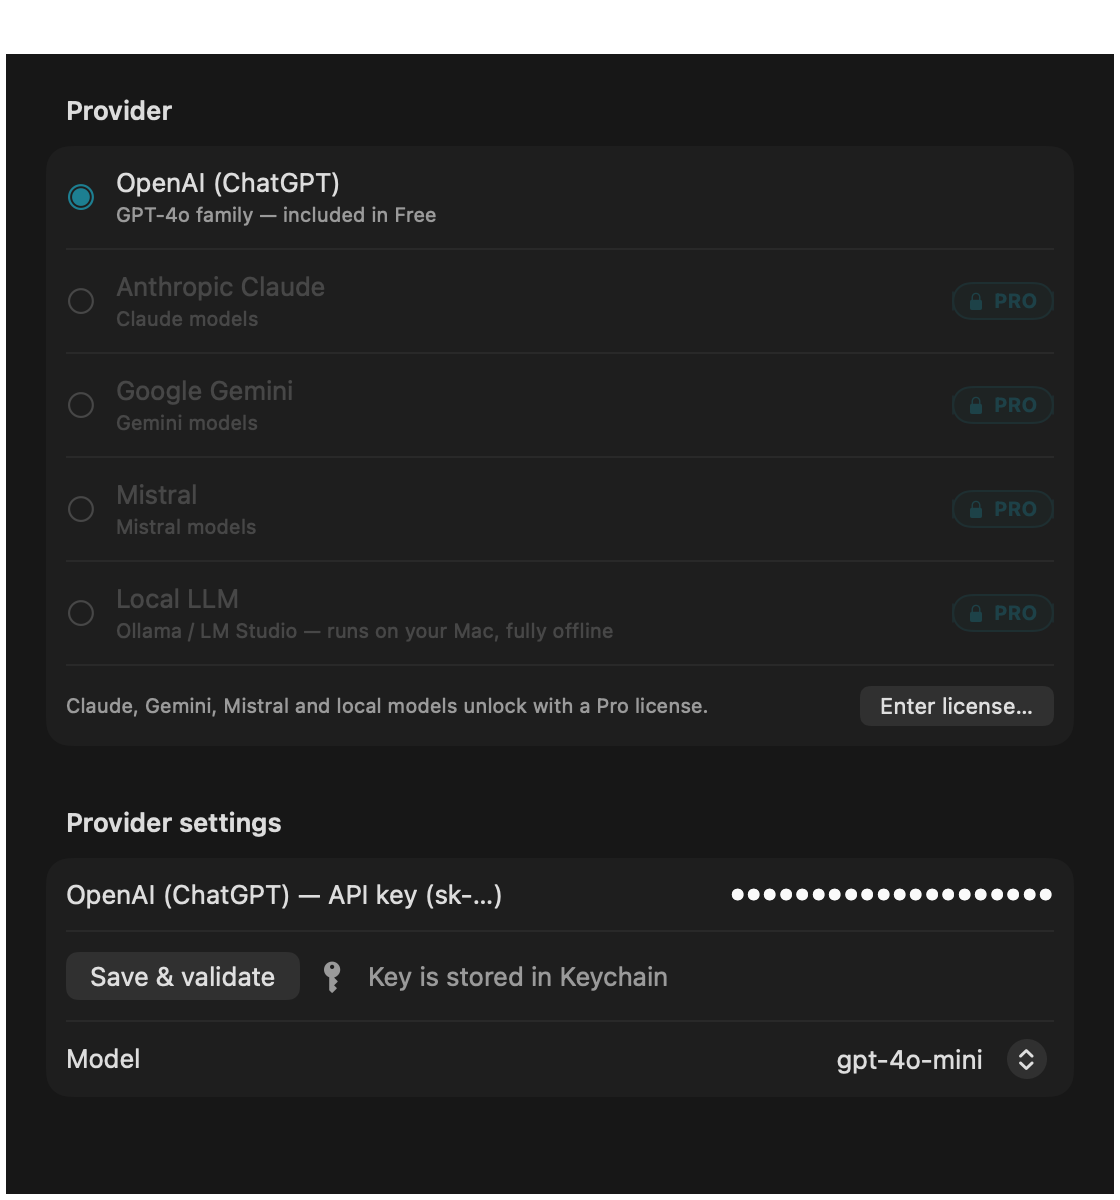
- AI Provider — bring-your-own-key configuration for the Max plan and legacy licenses (see below).
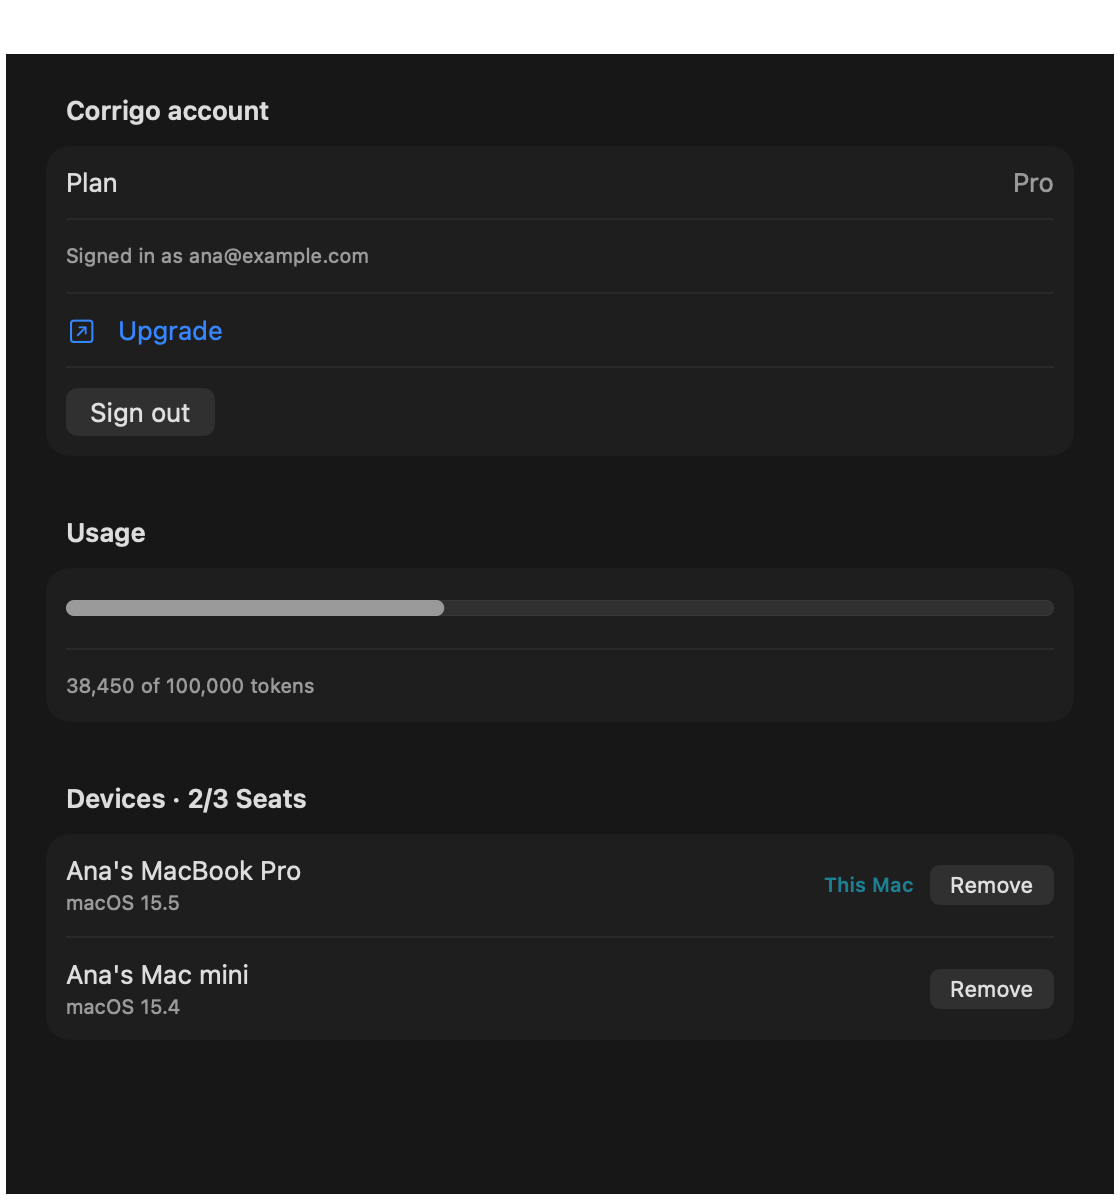
- Account — your plan, token usage, devices and sign-in (see plans & billing).
- Blocked apps — per-app blocklist by bundle ID. Password managers and terminals ship blocked.
Bring your own keys (Max & legacy)
By default Corrigo's hosted AI handles your requests — you never touch an API key. On the Max plan (and for legacy license owners) you can flip on Use my own API keys in Settings → Account: requests then go straight from your device to the provider you choose, never through Corrigo servers, and don't count against your token quota.
| Provider | Available with | Notes |
|---|---|---|
| OpenAI (ChatGPT) | Max / legacy | GPT-4o family via your OpenAI key. |
| Anthropic Claude | Max / legacy | Claude models via your Anthropic key. |
| Google Gemini | Max / legacy | Gemini models via your Google AI key. |
| Mistral | Max / legacy | Mistral models via your Mistral key. |
| Local LLM | Max / legacy | Ollama or LM Studio on your own machine — text never leaves it. |
Each provider stores its own API key in the Keychain (Windows: DPAPI). Switch providers any time — your keys stay saved.
Using a local model
- Install Ollama and pull a model:
ollama pull llama3.1 - In Settings → AI Provider choose Local LLM.
- Keep the default server URL
http://localhost:11434/v1(Ollama) or usehttp://localhost:1234/v1for LM Studio, and enter the model name.
No API key needed — corrections run fully offline.
Plans & billing
| Free | Pro — $6/mo or $60/yr | Max — $18/mo or $180/yr | |
|---|---|---|---|
| AI tokens per day | 20,000 (~20 fixes) | 200,000 | Unlimited |
| Devices | 1 | 3 | 10 |
| Rephrase tones | Neutral | All | All + custom |
| Translation | — | All languages | All languages |
| Bring your own keys | — | — | ✓ |
Full comparison on the pricing page. Every new account starts on Free — no card needed. Subscriptions are billed by Paddle (our merchant of record) and you can cancel any time: the plan stays active until the end of the paid period. First payment is refundable within 14 days — see the refund policy. Your usage bar and your devices live in Settings → Account, where removing a device instantly frees its seat.
Legacy Gumroad licenses
Bought Pro Yearly or Lifetime on Gumroad before subscriptions? Your license keeps working: open Settings → License, paste the key from your receipt and click Activate. Lifetime licenses keep bring-your-own-key access and all Pro features forever; yearly licenses run until their expiry date, then the app continues on the Free plan.
Privacy
- Text is sent to the AI provider only when you click the bubble or press ⌘⇧G — never while you type, never in the background.
- While you type, Corrigo reads the field locally only to decide when to show the bubble; language detection happens on-device.
- API keys and license keys live exclusively in the macOS Keychain (Windows: DPAPI).
- We keep token counters, not content. History lives on your devices — 30 days on Pro, unlimited with sync on Max.
- With a local LLM, your text never leaves the Mac at all.
- Full legal text: Privacy Policy, Terms, Cookies.
Troubleshooting
The bubble doesn't appear
- Does the field contain at least 3 words? (Threshold adjustable in Settings → General.)
- Is the app on your blocklist? Check Settings → Blocked apps.
- Is the Accessibility permission active? The menu bar menu shows a ⚠ warning when it isn't.
- Password fields and secure input never show the bubble — by design.
Permission looks enabled but doesn't work
A previous Corrigo build holds the grant. Open the setup again (menu bar → Run setup again…) and click Request permission — the stale entry is removed automatically, then re-enable Corrigo in the list.
Diagnostics from the Terminal
/Applications/Corrigo.app/Contents/MacOS/Corrigo --doctor
With a text field focused, this prints the whole chain: permission state, the focused element and whether it's editable, word count, and where the bubble would be placed.
"Corrigo is an app downloaded from the internet"
That is the normal first-open prompt for notarized apps. Click Open. If macOS still blocks it, you are not on the notarized DMG from corrigo.me — download again rather than using an old beta build.
Still stuck
Email support@corrigo.me. Billing and refunds: pricing, refunds, contact.